The Muse-sampleganger
One of MuseScore 4’s biggest features is by far Muse Sounds. By installing an external app named Muse Hub, you get access to much higher sound quality within MuseScore.
Common sense would be that they made that using some sort of standard interface for audio renderers, except they didn’t. For context, Muse Hub is a proprietary closed-source app even though MuseScore’s main strength is open-source.
This feels like some sort of back-stabbing to its contributors, but anyway.
MuseScore 4 developed a completely new interface specifically for Muse Sounds. It isn’t meant to work with anything else, and that’s reflected in the way it’s made:
The audio renderer is loaded and used with a shared library. There was no effort on making anything better, like an IPC protocol. And of course it only supports loading one and only one shared library: a library named libMuseSamplerCoreLib.so and that’s only providen using Muse Hub.
The Replacement
Fortunately, you can re-implement shared libraries in any systems programming language, but I find Zig to be easier and better suited for this.
What functions do we need?
Before reimplementing the shared library, I first need to know what I need to reimplement. Fortunately, given MuseScore is still open source (for now…), we can look at apitypes.h which contains all the functions and structs required in the shared library.
And then, we just need to put all those functions definitions in our source code
pub export fn ms_init() void {
    std.log.info("Initializing our döppelganger MuseSampler library!", .{});
}

pub export fn ms_contains_instrument(mpe_id: [*:0]const u8, musicxml_id: [*:0]const u8) c_int {
	// TODO
    return 0;
}

pub export fn ms_get_matching_instrument_id(pack: [*:0]const u8, name: [*:0]const u8) c_int {
	// TODO
    return 0;
}

pub export fn ms_get_instrument_list() *InstrumentList {
	// TODO
    return undefined;
}

// And so on...
Doing the same kind of stubs for all the 40+ functions we need, we should have enough to fool MuseScore!
Replacing the shared library
On Linux, the shared library is always located in /usr/lib/libMuseSamplerCoreLib.so. So I just backed up the original library to a separate file, and replaced libMuseSamplerCoreLib.so by a symbolic link to zig-out/lib/libmuse-sampleganger.so (this is where Zig places our build artifacts)
And sure enough we get
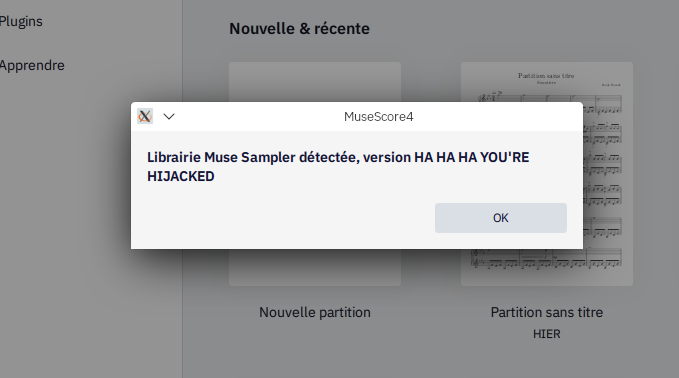
Instruments
The first thing I reimplemented is ms_get_instrument_list. This function needs to return an iterator that gives a list of instruments.
Of course after that I had to reimplement instruments, which fortunately just needs to be a struct containing few data
pub const InstrumentInfo = struct {
    /// Some unique ID for the instrument
    id: c_int,
    name: [:0]const u8,
    category: [:0]const u8,
    package: [:0]const u8,
    musicxml_sound_id: [:0]const u8,
    mpe_sound_id: [:0]const u8,

    // + some functions so MuseScore can retrieve the data
};
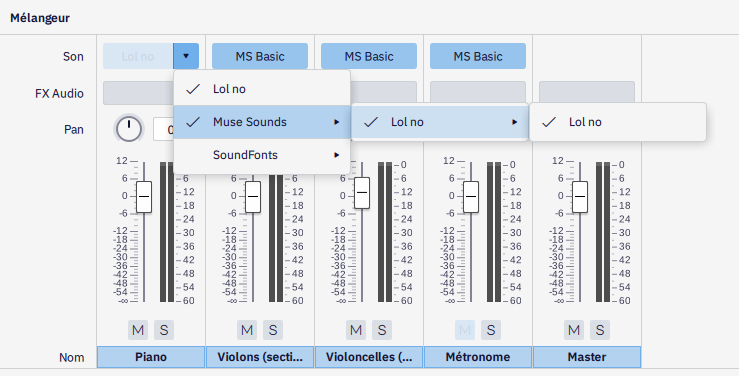
And then I just had to add my own dummy list of instruments:
const instruments = &[_]InstrumentInfo {
    .{
    	.id = 0,
    	.name = "Lol no",
    	.category = "Lol no",
    	.package = "Lol no",
    	.musicxml_sound_id = "Lol no",
    	.mpe_sound_id = "Lol no",
    },
};
And lo and behold, it works!
Adding a basic synthetizer
NOTES
If you watched Tantacrul’s video about MuseScore 4, you know one of the main wished features for Muse Sounds was for it to be able to “look-ahead” the notes.
Traditional synthetizers like VSTs can only look at one note at a time. While this is fine for an instrument like the piano, it can lower the sound fidelity for other instruments, notably string instruments.
In practice, the “look-ahead” feature means that MuseSampler directly knows all the notes in the score instead of just having one at a time.
This is done with the ms_MuseSampler_add_track_note_event function, which is called to add every note in a track. So I reimplemented it like so
pub export fn ms_MuseSampler_add_track_note_event(self: *MuseSampler, track: *Track, event: apitypes.ms_NoteEvent) apitypes.ms_Result {
    _ = track; // I don't care about track at the moment
    self.notes.append(.{
        .location = @intToFloat(f64, event._location_us) / std.time.us_per_s,
        .duration = @intToFloat(f64, event._duration_us) / std.time.us_per_s,
        .pitch = event._pitch,
        .frequency = midiPitchToFrequency(event._pitch),
    }) catch return apitypes.ms_Result_Error;
    return apitypes.ms_Result_OK;
}
All this does is add the given note to our notes list. We first convert the note’s location (= start time) and duration to seconds, and we use a small function named midiPitchToFrequency to convert the MIDI pitch to an usable frequency.
SYNTH
First, what’s a wave?
A wave is just some signal that repeats itself x times per second.
And this x is called the frequency of the wave.
Hence, a 20Hz wave is a signal that repeats itself 20 times per second.
For a synthetizer, We can choose among an infinity of wave types to implement, but there are 4 that shine by their mathematical simplicity, and thus were used a lot in chiptune:

As a first instrument, I’m gonna implement the square wave, simply because its computation is the simplest among all. Besides, we’ll get to implement the other one as we make more instruments for testing!
So, how do we output sound?
First, you need to know that the lowest element in an audio file is a sample. A sample is literally just one value, that can be from -1.0 to +1.0 (if we encode it in float). That’s just one value from our signal.
Then there’s the sample rate, this is how many samples we have in a second of audio. Usually this is set to 44100 Hz for reasons too long and too off-topic to explain here1.
Now we need to find how Muse Sampler outputs those samples.
Muse Sampler does so by having a ms_MuseSampler_process function. We’re provided with the current time, expressed in number of samples, and a buffer where we’ll write the samples we want.
I started by converting the time to seconds:
// The sample rate is the number of samples per second, so dividing the
// time in number of samples by the sample rate will give us seconds
var time = @intToFloat(f64, samples) / self.sample_rate;
And then, we can make a barebones loop for filling our sample buffer:
var i: usize = 0;
while (i < sample_count) : (i += 1) {
	// This is the sample value that we're gonna set later..
    var sample: f32 = 0;

    // When we're done, send it to all channels (2 channels for stereo)
    output._channels[0][i] = sample;
    output._channels[1][i] = sample;

	// We're going forward one sample at a time
    time += 1 / self.sample_rate;
}
First, we need to know which notes are currently playing, that’s also why we converted the time to seconds
var playing_notes = std.BoundedArray(Note, 32).init(0) catch unreachable;
for (self.notes.items) |note| {
    if (time >= note.location and time < note.location + note.duration) {
        playing_notes.append(note) catch {};
    }
}
Here, std.BoundedArray is a Zig data structure that avoids allocation but acts like an array list. It allows us to play up to 32 notes at a time (which is already quite a lot for a square synthetizer).
We loop through all notes and try to see which notes started before now and end after now: that is which notes are currently playing.
And now, we have a list of playing notes and time, so we just need to implement the square wave!
The square wave is good because its signal is literally just this:
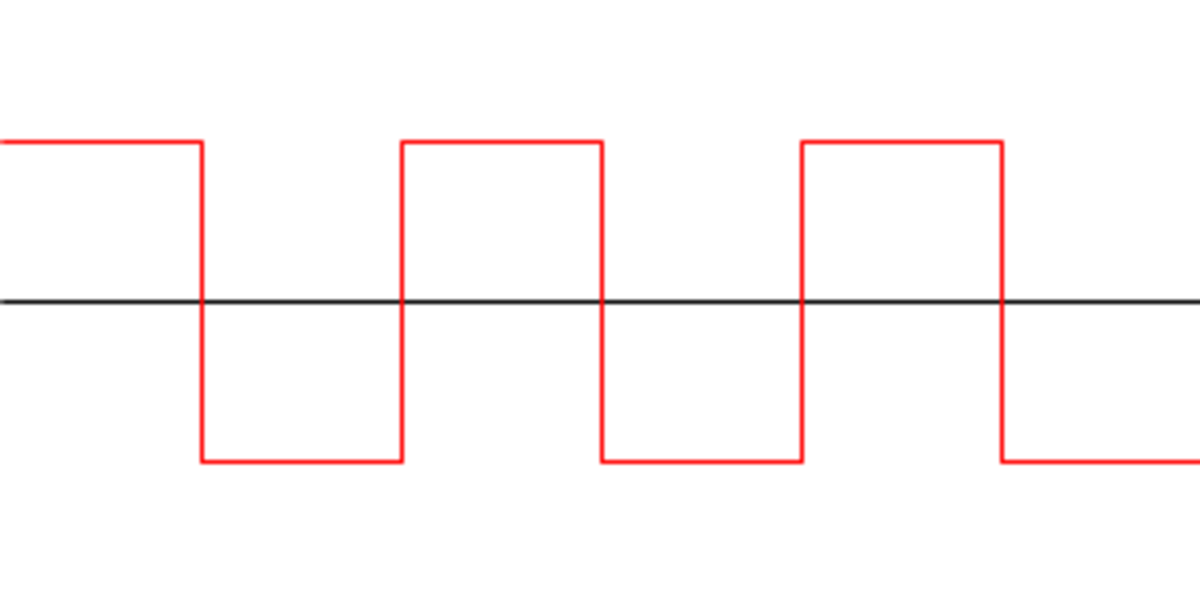
That means we can do this
for (playing_notes.constSlice()) |note| {
    // square wave
    const period: f32 = 1.0 / @intToFloat(f32, note.frequency);
    const value: f32 = if (@rem(time, period) < period / 2) -1.0 else 1.0;

    // 5% volume otherwise this will burst your ears wide open
    const volume: f32 = 0.05;
    sample += value * volume;
}
The period is the time it takes in seconds for a signal to repeat. Given the frequency is how many times it repeats in a second. It’s easy to see the period is 1 / frequency.
And then, square wave being square wave, if we’re before the middle of our signal, we have a value of -1, and if we’re after the middle, we have a value of 1.2 Like in the above image.
And voilà! We got a fully working square synthetizer!
In fact, we can test our square wave on some music I made:
(warning: the sound might not be.. very pleasing)
Magnifiscent.
For those who want to see, the code is available on GitHub.
In a nutshell, it’s because of CD audio and we’re still on it because we don’t need more. This is thanks to the Nyquist-Shannon theorem and the fact we can’t hear frequencies above 20,000 Hz. ↩︎
How do we know on which sides the -1 and the 1 go? Simple answer: we don’t! Our ears are only sensitive to variations. Why? Because the value of our sample is just how far we push the tympan of our loud speaker, and it’s the moving it back and forth that creates sound. ↩︎